In the world of precision measurement and quality control, the Profile Projector stands as one of the most trusted non-contact optical instruments. It enables technicians and engineers to inspect the dimensional accuracy and shape of components with high magnification. Commonly known as an optical comparator, this machine is used across various industries including automotive, plastics, electronics, and tool manufacturing.
In this guide, we will explore how to use a profile projector, including setup, operation, and best practices, to help quality professionals and lab technicians achieve accurate and reliable measurements.
What is a Profile Projector
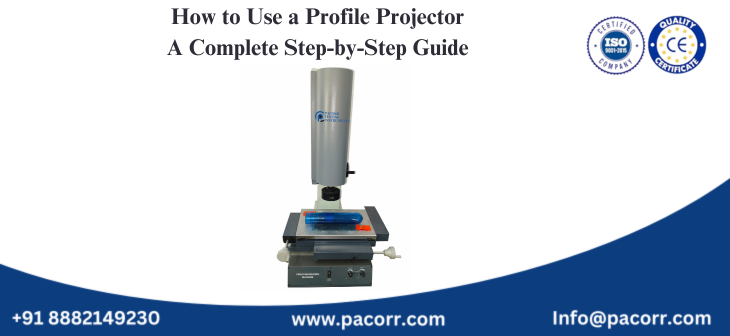
A profile projector is an optical measurement device that projects an enlarged image of a test object onto a screen. It uses magnifying lenses and lighting to allow for precise inspection of edges, dimensions, radii, angles, and threads. The projected image is compared to standard dimensions or overlays to verify if the component is within tolerance.
It is widely used for non-destructive inspection of delicate and small parts that are otherwise hard to measure with contact-based tools like calipers or micrometers.
Components of a Profile Projector
To understand the operation, first get familiar with the main components of the machine
- Projection Screen – A circular or rectangular screen where the magnified image is displayed
- Lens Assembly – Interchangeable lenses such as 10x, 20x, 50x, and 100x used to magnify the component
- Worktable or Stage – The platform where the component is placed, often fitted with micrometers for precise movement
- Lighting System – Includes both transmitted light (from below) and reflected light (from above)
- Digital Readout or DRO – For displaying linear and angular measurements
- Angle Measuring Scales – For measuring thread angles, gear teeth, and slopes
How to Use a Profile Projector – Step by Step Instructions
Step 1 – Prepare the Profile Projector
- Clean the stage and lenses using a soft lint-free cloth to remove dust or debris
- Ensure the power supply is stable and the light source is working properly
- Turn on the projector and allow the illumination system to warm up for a few minutes
Step 2 – Select the Appropriate Lens
- Choose a magnification lens based on the size and detail of the part you are inspecting
- For general inspection use 10x or 20x
- For micro-features like fine threads or small holes use 50x or 100x
- Insert the lens properly in its holder and lock it in position
Step 3 – Place the Component on the Stage
- Mount the component securely on the glass stage or hold it in place using a fixture or clamp
- If the component is too small, use tweezers or gloves for accurate positioning
- Ensure it lies flat and stable on the surface to avoid image distortion
Step 4 – Adjust the Illumination
- Use transmitted light for transparent or thin components like films or gaskets
- Use reflected light for metallic or opaque parts
- Adjust the light intensity to get a clear contrast on the projection screen
Step 5 – Focus the Image
- Use the focus knob to sharpen the image of the part on the screen
- Ensure all edges, corners, or threads appear crisp and well defined
- If required, slightly reposition the component for better orientation
Step 6 – Measure the Dimensions
- Align the feature to be measured with the scale on the screen or the digital readout
- For length, width, and diameter, use the XY micrometers on the stage
- For angle or profile inspection, rotate the protractor scale or overlay template
- Note the readings from the digital display or screen scale
Step 7 – Compare with Standard Drawings
- Place the overlay chart or drawing on the projection screen to compare the actual shape
- Match profiles for gears, punches, threads, or molded parts
- Any deviation from the standard line indicates non-conformity
Step 8 – Document the Results
- Record all measurements in the inspection sheet
- If software integration is available, export the readings directly to your Quality Management System
- Mark pass or fail based on the tolerance levels defined for the part
Best Practices for Accurate Results
- Always keep the lenses clean and store them properly after use
- Use anti-vibration mats or place the projector on a solid bench to reduce errors
- Calibrate the stage micrometers periodically for consistent results
- Do not touch the projection lens with bare hands
- Avoid placing large parts that extend beyond the stage area
- For repeated inspection tasks, use jigs or fixtures for consistent positioning
Applications of Profile Projector
- Inspecting plastic parts like caps, containers, or injection moldings
- Measuring thread pitch and angle in mechanical fasteners
- Verifying gear teeth profiles for automotive or machinery components
- Inspecting die-punch contours in tool manufacturing
- Evaluating layout patterns in PCBs or electronic components
Advantages of Using a Profile Projector
- Non-contact and safe for delicate items
- Quick visual inspection with no need for complex setups
- Suitable for high-volume inspection tasks
- Accurate measurements down to 0.001 mm
- Time saving for quality assurance teams
- Applicable to both transparent and opaque materials
Frequently Asked Questions
Q. Can I use a profile projector for metal components
Yes profile projectors are ideal for inspecting metal parts such as gears pins and machined items using reflected light
Q. How accurate is a profile projector
Most profile projectors offer accuracy up to 0.001 mm depending on the lens and stage calibration
Q. What is the difference between vertical and horizontal projection
Vertical projection is used for flat parts while horizontal projection is ideal for cylindrical components like shafts or screws
Q. Can it measure internal features
Profile projectors mainly focus on external outlines though some internal details can be measured with high magnification and light adjustment
Q. Is software required to operate the projector
Basic models do not require software but advanced digital versions offer image capture and analysis tools for documentation
Conclusion
The Profile Projector is a valuable tool for quality control professionals looking for quick accurate and non-contact dimensional inspection. Understanding how to use a profile projector properly helps ensure consistent results and improves product reliability in the manufacturing process. Whether you are inspecting plastic moldings metal gears or electronic parts this device can make your inspection process faster and more dependable.
For more details or to explore Pacorr’s range of optical measurement equipment visit our website pacorr dot com or reach out to our experts for assistance.
Recent Blogs
Enhance your understanding of testing and precise quality control indistinct applications with our
knowledge based articles coming from top editors of industry leaders.
Thanks to Pacorr Testing instruments, we have all the required quality testing instruments that have helped us to ensure the best quality delivered to our clients.

Danish
Fair Exports Pvt. Ltd.


