Introduction: Pacorr’s Profile Projector in Dimensional Inspection
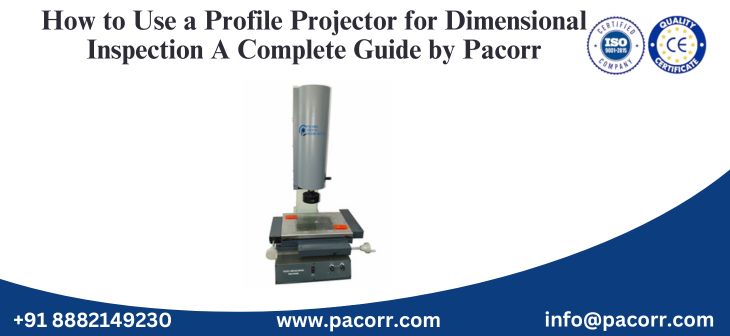
Pacorr offers a cutting-edge Profile Projector that is specially designed for accurate and non-contact dimensional inspection of precision components. As a trusted Profile Projector manufacturer, Pacorr understands the importance of repeatability and clarity in engineering measurements. This optical device projects the magnified image of a specimen onto a built-in screen, allowing for detailed analysis of shape, contour, and dimension without physical contact.
In industries where micron-level precision matters—such as aerospace, automotive, electronics, plastic molding, and metal tooling—using a profile projector becomes essential to ensure product compliance with design tolerances. This article provides a step-by-step operational guide to using a Profile Projector for dimensional inspection while adhering to quality assurance and metrology principles.
What is a Profile Projector?
A Profile Projector, also known as an optical comparator, is a measuring instrument used for inspecting the geometrical shape and dimensions of manufactured parts. It works on the principle of shadow projection or optical magnification. The device uses a light source, lenses, and a screen to project the profile or shadow of a part, which is then compared with scaled diagrams or overlay charts (known as templates or reticles).
Key applications include:
- Measurement of 2D features like length, width, angle, and radius
- Checking external contours and internal holes
- Comparison with engineering drawings
- Inspection of tiny machined or molded components
Essential Components of a Profile Projector
To effectively operate a profile projector, it's important to understand its primary components:
- Screen: Circular viewing screen where the magnified image is projected.
- Objective Lenses: Provide magnification (commonly 10x, 20x, 50x, 100x).
- Stage (XY Table): Platform on which the specimen is placed, allowing for linear and angular adjustments.
- Light Source: Either contour (collimated) or surface (reflected) illumination.
- Micrometer Scales: Measure X and Y displacement for dimensional analysis.
- Digital Readout (DRO): Displays measurement values, coordinates, and angles digitally.
- Protractor or Angle Measurement Dial: Used for angular inspections.
Preparation: Pre-Inspection Checklist
Before beginning any dimensional inspection using a profile projector, ensure the following:
- The profile projector is placed on a stable, vibration-free surface.
- Calibration of the projector is up-to-date using standard gauge blocks or reference samples.
- All lenses are clean and free from dust or fingerprints.
- The component or part to be measured is clean and dry.
- Appropriate overlays or reticles for comparison are available.
- Power supply is stable and the workspace is adequately illuminated.
Also Read- How to Use a Profile Projector – A Complete Step-by-Step Guide
Step-by-Step Guide to Using a Profile Projector
Let’s now explore the step-by-step procedure to conduct accurate dimensional inspections with Pacorr’s Profile Projector:
Step 1: Power On and Warm-Up
- Turn on the main power switch.
- Allow the light source to warm up for at least 5–10 minutes for consistent brightness.
- Select the desired light mode (contour or surface illumination) depending on the feature to be inspected.
Step 2: Specimen Placement on the Stage
- Place the part on the XY stage using tweezers or gloves to avoid contamination.
- Fix the component gently with stage clips or vacuum clamps if available.
- Use the micrometer knobs to align the specimen under the lens field of view.
Step 3: Focus the Image
- Select the required magnification lens (e.g., 10x or 20x).
- Adjust the vertical focus knob slowly until the projected image appears sharp and defined on the screen.
- Fine-tune the focus to remove any parallax or distortion.
Step 4: Measurement and Comparison
- Use the screen’s grid, micrometer scale, or digital readout to measure:
o Linear distances (e.g., width, length, diameters)
o Angular features (chamfers, tapers, profiles)
o Radii and arc lengths
- Compare the projected profile with a master drawing or overlay chart to detect deviation.
- For complex parts, rotate the specimen on the stage to capture different viewing angles.
Step 5: Use of DRO for Digital Precision
- If your Profile Projector is equipped with a DRO system:
o Zero the X and Y coordinates at a reference point.
o Move the stage precisely and read dimensional values in real time.
o Save or record measurement readings for inspection reports or SPC analysis.
Step 6: Documenting the Inspection
- Note all observed deviations and dimensional tolerances.
- Capture images (if the projector supports camera or display output) for traceability.
- Mark components that pass or fail based on dimensional conformance.
- Reset the stage and clean the lens after each test.
Common Mistakes to Avoid in Dimensional Inspection
- Incorrect Lighting Mode: Using surface lighting for edge contour inspection can result in unclear images.
- Uncalibrated Equipment: Leads to inaccurate measurements and invalidates quality assurance data.
- Improper Focus: Distorted or blurry images can cause misreading of dimensions.
- Overlooking Thermal Stability: Frequent power cycling can cause lamp fluctuation, affecting shadow sharpness.
Applications Across Industries
Pacorr’s Profile Projector is widely used across multiple industries:
- Automotive: Checking gears, shafts, clutch plates, piston rings
- Plastic Molding: Inspecting injection-molded parts like clips, caps, and connectors
- Metal Fabrication: Dimensional validation of machined components
- Electronics: Verifying tiny PCB connectors and semiconductor outlines
- Medical Devices: Measurement of catheter tips, syringes, implant outlines
Also Read- Boosting PET Preform Quality with Pacorr’s Profile Projector Solutions
Advantages of Using a Profile Projector
- Non-Contact Inspection: No risk of damaging delicate parts
- High Magnification: Capable of observing features invisible to the naked eye
- Fast Measurements: Efficient for repetitive inspections in batch production
- Versatility: Suitable for both soft and hard materials
- Reliable for Quality Control: Ensures compliance with ISO and ASTM dimensional standards
Tips for Optimizing Your Profile Projector’s Performance
- Regularly clean and calibrate the lenses and stage surface.
- Replace the light source as per maintenance schedule to maintain image brightness.
- Use anti-static brushes to clean plastic samples before placing them on the stage.
- Store overlays in protective covers to prevent distortion.
- Train QA staff in proper focusing and DRO usage techniques.
Why Choose Pacorr as Your Profile Projector Manufacturer
As a leading Profile Projector manufacturer, Pacorr delivers precision inspection solutions trusted by global manufacturers. Our profile projectors are engineered with superior optics, smooth-stage movement, and robust build quality to withstand high-throughput quality control environments. From manual models to digital DRO-enabled systems, we offer tailored solutions to meet diverse inspection needs.
Pacorr’s customer-centric approach includes installation training, calibration support, and after-sales service to ensure that your dimensional inspections remain consistent, reliable, and traceable.
Conclusion
Pacorr’s Profile Projector is a powerful tool in the dimensional inspection process, offering unmatched accuracy, usability, and versatility. By understanding how to operate the projector effectively, manufacturers and QA engineers can ensure their components meet the tightest tolerances and design specifications. From setup to documentation, each step in the process contributes to building high-quality, defect-free products.
For anyone looking to improve their dimensional inspection processes, selecting the right equipment is critical. Trust Pacorr, your reliable Profile Projector manufacturer, to deliver precision, performance, and peace of mind in every inspection task.
Recent Blogs
Enhance your understanding of testing and precise quality control indistinct applications with our
knowledge based articles coming from top editors of industry leaders.
Thanks to Pacorr Testing instruments, we have all the required quality testing instruments that have helped us to ensure the best quality delivered to our clients.

Danish
Fair Exports Pvt. Ltd.


