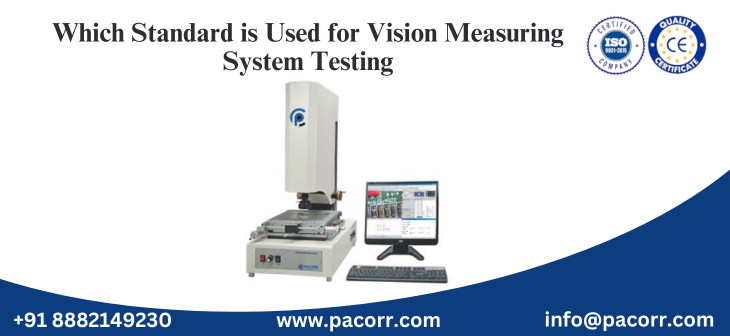
Pacorr Vision Measuring System is a cutting-edge solution for industries that require high-precision dimensional measurement and quality inspection of components. As manufacturing becomes more advanced and demands for accuracy increase, ensuring the reliability and repeatability of measurements is critical. For this reason, it is essential to test Vision Measuring Systems (VMS) using established standards. In this detailed guide, we will explore which standard is used for Vision Measuring System testing, why standardization is important, and how Pacorr’s product lineup aligns with global expectations for measurement accuracy.
Understanding Vision Measuring Systems and Their Industrial Significance
A Vision Measuring System (VMS), often called a video measuring system or optical measurement machine, is an advanced metrology device used for non-contact, high-accuracy measurement of various objects. It utilizes cameras, sophisticated optics, and software to inspect, measure, and document physical dimensions and features. Industries such as electronics, automotive, aerospace, medical device manufacturing, and precision engineering rely on these systems for stringent quality control.
Why Standardization Matters in Vision Measuring System Testing
Accurate measurements directly influence product quality and customer satisfaction. If a Vision Measuring System is not regularly tested against recognized standards, measurement errors can go unnoticed, leading to defective parts, costly recalls, or failed compliance audits. That’s why international and national organizations have established standards to guide the testing, calibration, and verification of Vision Measuring Systems. Adhering to these standards demonstrates a commitment to reliability, safety, and product excellence.
Which Standard is Used for Vision Measuring System Testing
When considering which standard is used for Vision Measuring System testing, several key international documents come into play. The most widely recognized and referenced standard is ISO 10360. Let’s examine what this standard means for Vision Measuring Systems, how it is applied, and how it relates to other measurement standards.
ISO 10360: The Global Benchmark for Vision Measuring System Testing
What is ISO 10360
ISO 10360 is a multi-part international standard created by the International Organization for Standardization (ISO). It specifies acceptance and reverification tests for coordinate measuring machines (CMMs), including those equipped with optical measurement capabilities such as Vision Measuring Systems. The most relevant sections for VMS testing are:
- ISO 10360-7:2011 – Geometrical Product Specifications (GPS) — Acceptance and reverification tests for coordinate measuring machines (CMM) — Part 7: CMMs equipped with imaging probing systems
- ISO 10360-8:2013 – Geometrical Product Specifications (GPS) — Acceptance and reverification tests for coordinate measuring machines (CMM) — Part 8: CMMs with optical distance sensors
Why is ISO 10360 Critical for Vision Measuring System Testing
This standard establishes a uniform methodology for testing and verifying the accuracy and repeatability of Vision Measuring Systems. By following ISO 10360, manufacturers and calibration laboratories can:
- Ensure measurement traceability to international standards
- Maintain consistent and reliable performance
- Satisfy quality management requirements for ISO 9001 and related certifications
- Build trust with customers by demonstrating adherence to globally recognized best practices
Key Test Procedures in ISO 10360 for Vision Measuring Systems
- Length Measurement Error (E): Tests the maximum error when measuring a certified length artifact under controlled conditions.
- Repeatability (R): Evaluates the system’s ability to provide the same measurement result when the same artifact is measured multiple times.
- Probing Performance (P): Assesses the performance of the system’s optical or imaging probe when measuring defined reference standards.
- Volumetric Accuracy: Measures the system’s ability to accurately capture three-dimensional geometry over its full working volume.
These tests are performed using reference artifacts such as gauge blocks, step gauges, or calibrated spheres, which have traceability to national metrology institutes.
Other Important Standards Related to Vision Measuring System Testing
While ISO 10360 remains the primary reference, several other standards and guidelines play a supporting role in Vision Measuring System testing:
VDI/VDE 2617 (Germany)
The VDI/VDE 2617 series, developed by the Association of German Engineers, covers the inspection of coordinate measuring machines with optical sensors. This standard details testing methods, uncertainties, and performance specifications for vision-based systems.
ASTM E57 (United States)
ASTM E57 is a committee that focuses on 3D imaging systems. While it is broader and covers laser scanning and point cloud processing, it provides terminology and basic performance criteria relevant to advanced optical metrology.
ISO/IEC 17025 (Calibration Laboratories)
ISO/IEC 17025 outlines requirements for the competence of testing and calibration laboratories. Any laboratory calibrating a Vision Measuring System should comply with this standard to guarantee reliable results.
Other Regional Standards
Different regions may have additional national standards, but most reputable manufacturers and calibration labs worldwide recognize and implement ISO 10360 as the foundation for Vision Measuring System testing.
How Pacorr Vision Measuring Systems Align with ISO 10360 and Global Standards
Pacorr Vision Measuring Systems are engineered with precision in mind and are tested according to internationally accepted standards. Here’s how Pacorr ensures its products stand out:
Advanced Optical Components
Each Pacorr Vision Measuring System is equipped with high-resolution optics, precise illumination, and calibrated imaging sensors. These components are designed for robust performance and minimal measurement error, fully supporting ISO 10360 testing requirements.
Traceable Calibration and Documentation
Pacorr provides comprehensive calibration certificates for each Vision Measuring System, ensuring all measurements are traceable to national and international standards. Calibration processes follow ISO 10360 test procedures, with documentation available for customer audits and quality management compliance.
Continuous Improvement and Quality Assurance
Pacorr’s commitment to excellence means ongoing review of the latest versions of ISO 10360 and related standards. The design, software algorithms, and verification methods are continuously refined to provide the highest level of measurement confidence.
Best Practices for Implementing Vision Measuring System Standards in Your Workflow
For manufacturers and quality professionals using Vision Measuring Systems, adopting a standard like ISO 10360 should be part of an ongoing quality improvement strategy. Here are some recommended best practices:
- Schedule Regular Calibration: Periodic calibration against certified artifacts ensures ongoing accuracy and helps detect drift or wear in the system.
- Train Personnel: Operators should be familiar with the principles of ISO 10360 and know how to interpret calibration results.
- Maintain Traceability: All calibration and verification activities should be recorded and traceable to recognized standards.
- Choose Certified Reference Artifacts: Use only artifacts with valid traceability certificates for verification and daily checks.
- Implement Corrective Actions Promptly: If test results fall outside of accepted limits, address the root cause immediately to maintain measurement integrity.
Frequently Asked Questions: Which Standard is Used for Vision Measuring System Testing
Q1: Which standard is considered the global benchmark for Vision Measuring System testing?
A1: ISO 10360, especially ISO 10360-7 and ISO 10360-8, is the most widely recognized international standard for Vision Measuring System testing.
Q2: How often should a Vision Measuring System be calibrated according to standards?
A2: The frequency depends on usage and quality requirements, but annual calibration following ISO 10360 guidelines is recommended.
Q3: Are there national standards apart from ISO for Vision Measuring Systems?
A3: Yes, VDI/VDE 2617 (Germany) and ASTM E57 (USA) provide additional guidelines, but ISO 10360 is the global reference.
Q4: Why is traceability important in Vision Measuring System testing?
A4: Traceability ensures that all measurements are linked to recognized national or international standards, building confidence in results.
Q5: Does Pacorr provide Vision Measuring Systems that comply with ISO 10360?
A5: Yes, Pacorr Vision Measuring Systems are designed, calibrated, and verified in accordance with ISO 10360 and other relevant international standards.
Conclusion: Choosing the Right Standard for Vision Measuring System Testing
Selecting the appropriate standard is crucial for maximizing the performance and reliability of a Vision Measuring System. ISO 10360 stands out as the definitive answer to the question: which standard is used for Vision Measuring System testing. By aligning with this and related standards, Pacorr ensures its Vision Measuring Systems deliver world-class precision, repeatability, and traceability for a wide range of industrial applications. Adhering to these standards protects your investment, strengthens your quality assurance process, and guarantees your products meet the highest global benchmarks.
If you are seeking an advanced Vision Measuring System for your laboratory or production environment, always verify that the manufacturer, such as Pacorr, strictly follows ISO 10360 and related standards. This approach will ensure your measurements are accurate, compliant, and trusted worldwide.
Recent Blogs
Enhance your understanding of testing and precise quality control indistinct applications with our
knowledge based articles coming from top editors of industry leaders.
Thanks to Pacorr Testing instruments, we have all the required quality testing instruments that have helped us to ensure the best quality delivered to our clients.

Danish
Fair Exports Pvt. Ltd.


