Pacorr's Profile Projector is a sophisticated, reliable, and precise optical measurement tool essential for various industries such as automotive, aerospace, manufacturing, and quality assurance labs. As a leading Profile Projector manufacturer, Pacorr offers exceptional accuracy and ease of use in dimensional inspection tasks, enabling users to quickly identify and rectify production flaws. Understanding the correct operation of this instrument is critical to leveraging its full capabilities and ensuring the quality of manufactured components.
What is a Profile Projector?
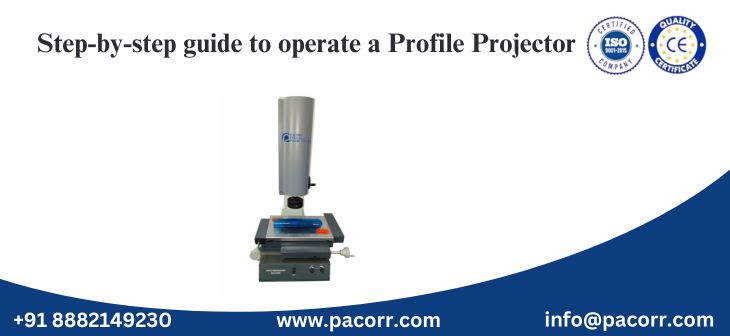
A Profile Projector, also known as an optical comparator, is an optical measuring instrument used to inspect and measure the dimensions of small parts with high accuracy. It magnifies the shadow of an object onto a screen, allowing precise dimensional analysis. With its magnifying lens and advanced optics, a Profile Projector provides a clear, enlarged silhouette of the specimen for thorough inspection.
Step-by-Step Guide to Operate a Profile Projector
Step 1: Preparing the Instrument
Begin by ensuring the Profile Projector is placed on a stable, vibration-free surface. Turn on the device and allow it to stabilize for at least five minutes to ensure the accuracy of measurements. Verify that the screen and lens are clean and free of dust or debris, as contaminants can significantly impact measurement precision.
Step 2: Setting Up the Specimen
Place the specimen securely onto the glass stage or holder. Use clamps or holding devices provided by the Profile Projector manufacturer to ensure the part remains stable during measurement. Position the specimen centrally to ensure optimal visibility on the screen.
Step 3: Adjusting Focus and Magnification
Pacorr's Profile Projector is equipped with user-friendly focus and magnification controls. Adjust the magnification setting to suit the dimensional requirements of the specimen. Higher magnification is typically used for smaller components requiring intricate measurement, while lower magnification is ideal for larger objects. Once the appropriate magnification level is selected, adjust the focus knob until the silhouette projected onto the screen is sharp and clearly defined.
Step 4: Aligning the Specimen
Alignment is crucial for accurate measurement. Use the X-Y stage controls to move the specimen precisely into position. Ensure the features you want to measure align clearly and centrally within the crosshairs or measurement grids on the projection screen. Proper alignment is fundamental to achieving repeatable and accurate measurement results.
Step 5: Measuring the Specimen
Pacorr Profile Projectors typically feature a digital readout system (DRO) to facilitate accurate measurements. Use the DRO interface to set the reference zero point on the feature you wish to measure. Next, move the stage to measure the distance between points or features accurately. Record the measurements provided by the DRO for analysis.
Step 6: Using Advanced Measurement Features
Modern Profile Projectors from Pacorr include advanced features such as angle measurements, radius measurements, and complex geometry assessments. To measure angles, position the lines on the projection screen and use the DRO to obtain precise angular values. For radius measurements, align the curvature of the object with the reference circle projected on the screen.
Step 7: Recording and Reporting Results
Once measurements are complete, record all relevant data clearly and systematically. Most Profile Projectors offer connectivity options allowing data transfer directly to computers for digital reporting and analysis. Utilize this feature to maintain accurate records and facilitate quality control documentation effectively.
Step 8: Turning Off the Profile Projector
After completing your measurements and recording all data, carefully remove the specimen from the stage. Ensure the glass surface is clean and free of debris. Turn off the Profile Projector and allow the device to cool down if necessary before covering it to protect from dust and environmental contaminants.
Key Tips for Accurate Operation
- Regularly clean the projection screen, lenses, and stage area to maintain optical clarity.
- Perform routine calibration using standard calibration blocks or master parts provided by the Profile Projector manufacturer.
- Avoid excessive force or rapid movements when handling controls to maintain the precision mechanism.
- Keep a consistent environmental temperature, as extreme temperatures can affect measurement accuracy.
Benefits of Using Pacorr's Profile Projector
As an experienced Profile Projector manufacturer, Pacorr ensures superior quality and performance of their measuring instruments, offering significant benefits:
- Enhanced Accuracy: Achieve precise measurements critical for quality assurance and compliance.
- Efficiency and Productivity: Accelerate inspection processes with user-friendly interfaces and rapid measurements.
- Versatility: Suitable for a wide range of materials and part complexities.
- Durability: Designed for long-term reliability and minimal maintenance.
Applications of Profile Projectors
Pacorr's Profile Projectors find extensive use across various sectors, including:
- Automotive Industry: Inspection of intricate components like gears, threads, and shafts.
- Aerospace Industry: Precise measurement of aircraft parts such as turbine blades and engine components.
- Electronics and Semiconductor Manufacturing: Ensuring dimensional accuracy of micro-components.
- Medical Devices: Accurate measurement of surgical instruments and medical implants.
Why Choose Pacorr as Your Profile Projector Manufacturer?
Selecting Pacorr as your Profile Projector manufacturer guarantees top-tier measurement solutions, backed by extensive expertise and industry recognition. Pacorr's commitment to innovation, rigorous quality standards, and exceptional customer support positions them as an authoritative and trustworthy provider in the field of precision measurement tools.
Conclusion
Operating a Profile Projector correctly is crucial to harnessing its full potential for accurate dimensional measurement and quality assurance. By following this detailed, step-by-step guide, users can confidently utilize Pacorr's Profile Projector to enhance precision and efficiency in their inspection processes. Trust in Pacorr’s proven expertise to ensure consistent, high-quality measurement results.
Recent Blogs
Enhance your understanding of testing and precise quality control indistinct applications with our
knowledge based articles coming from top editors of industry leaders.
Thanks to Pacorr Testing instruments, we have all the required quality testing instruments that have helped us to ensure the best quality delivered to our clients.

Danish
Fair Exports Pvt. Ltd.


