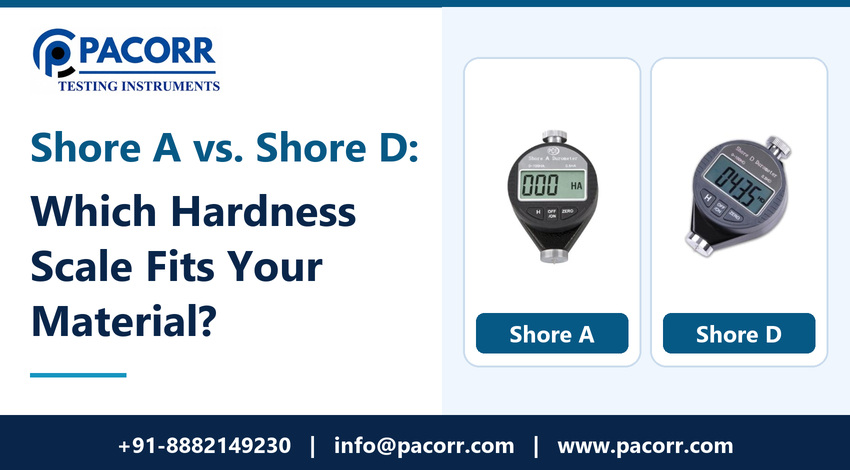
Use Shore A for many flexible rubbers and elastomers, such as suitable gasket compounds and flexible mouldings. Consider Shore D for harder rubber and rigid or semi-rigid plastics when the specified method permits it. If the drawing calls for a scale, use that scale, test method, specimen and reading time. A certificate that says “70 Shore D” cannot answer whether a part meets a “70 Shore A” requirement.
Both scales measure indentation hardness with a durometer. The two instruments use different indenter shapes and spring forces, so the numbers cannot be compared directly. The sections below explain how to choose a scale, get consistent readings, and decide whether a difference comes from the material, the specimen or the test setup.
What is the difference between Shore A and Shore D?
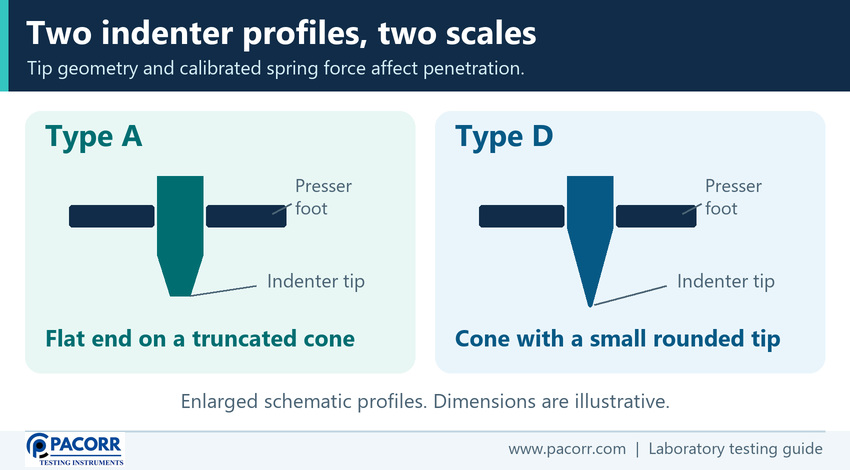
The choice begins with how strongly the material resists indentation. Shore A can distinguish changes across many compliant compounds. Shore D measures harder materials with a different tip profile and a stronger spring response at a given indicated value. Both display numbers from 0 to 100, and the letter identifies the measurement system behind the number.
| Question | Shore A | Shore D |
|---|---|---|
| Usual starting point | Flexible rubber and elastomers | Harder elastomers and suitable stiff plastics |
| Indenter profile | Truncated cone with a flat end | Cone with a small rounded apex |
| Force response | Type A spring characteristic | Higher force at a given indication |
| How to report | Include Shore A, method and read time | Include Shore D, method and read time |
These are starting points. A thermoplastic elastomer can be soft enough for Shore A, while a hard polyurethane can call for Shore D. A grade name such as EPDM, silicone or polyurethane does not establish the test scale without a formulation, expected response and specification. The finished part may also be too thin, curved or narrow for a routine reading even when the compound fits the scale.
What does a Shore durometer measure?
The durometer has a presser foot and a spring-loaded indenter. The foot seats against the test surface and establishes the reference plane. As the foot comes into contact, the specimen pushes the indenter back into the gauge to an extent that depends on how much the material deforms under the specified conditions. The instrument translates the position into a hardness reading. Within one scale, a higher reading indicates less penetration under the same test conditions.
The number describes a local indentation response. It has no pressure or length unit, and it does not directly supply tensile strength, elastic modulus or the load needed to puncture the part. The instrument reads during contact at the time defined by the method. Measuring the mark after lifting the foot would measure a different condition because the specimen can recover after unloading.
The spring inside the gauge and the force used to seat the foot perform different jobs. A stand can make approach and seating more repeatable if it is compatible with the durometer and method. The scale still depends on the specified tip, spring response and indication. Mounting a Type A gauge on a heavier stand does not produce a Type D measurement.
How do you choose the right scale for a new material?
Start with the decision. Receiving inspection answers whether a particular lot meets agreed requirements. Development testing asks whether the selected method can distinguish meaningful differences among candidate grades. A release method needs a documented scale and decision rule. A development trial can compare scales on separate eligible sites and use the results to propose a method.
| Sample or requirement | What to check first |
|---|---|
| Flexible seal, gasket or soft moulding | Consider Shore A on a suitable surface or approved witness plaque. |
| Stiff polymer plaque or hard rubber | Consider Shore D if the relevant method and specification permit it. |
| Thermoplastic elastomer with no target scale | Review the grade and test representative samples that cover its expected variation. |
| Small O-ring, thin film or coating on metal | Resolve specimen geometry, thickness and support before choosing the scale. |
| Drawing with an existing hardness target | Apply the named scale and method, or agree a documented change with the specification owner. |
If the drawing says only “hardness 70”, ask the specification owner to identify the scale, method, specimen and tolerance before using the value to release material. If a supplier provides an internal method, agree how it relates to the purchase requirement. Record the agreement on the drawing or inspection plan, where the next lab and shift can retrieve it.
What if readings are close to a scale limit?
An instrument can display a reading near either end of its scale while giving little distinction between materials. Several harder grades can cluster at the upper end of Shore A, for example. A very compliant specimen may give little separation on Shore D. More display digits do not recover discrimination lost through the choice of scale or specimen.
During development, test suitable samples from the soft, nominal and hard ends of the expected production range. Compare the order and spread of individual readings across fresh sites. Where the governing method permits, repeat with a second scale and record it independently. A scale that separates nominal grades in one trial should also give a stable response across representative lots and operators before adoption.
If a specified result persistently crowds a scale limit, document the limitation and consult the specification owner. Preserve the original observations and label any supplementary results by scale. Changing the instrument used for acceptance also requires reviewing the specified limits and what historical results can still be compared.
Can you convert Shore A to Shore D?
There is no universal conversion suitable for acceptance testing. The two tip profiles and spring forces apply different stresses to the material. Formulation, fillers, cure, dwell and temperature can change the relationship between the readings. An indicative chart may help compare manufacturers' descriptions during initial screening. A direct test on the specified scale is needed for the inspection report.
For example, if the certificate gives 65 Shore A and the purchase specification requests Shore D, confirm the intended method with the specification owner and measure suitable specimens with a Type D instrument. Keep the certificate value as received. For a development project that tests both scales on matched plaques, document the relationship only for those materials and conditions. Retain the original readings so future changes can be assessed against the same method.
Which standards apply to rubber and plastics?
Name the standard and edition that the drawing, customer specification or laboratory procedure requires. Several documents cover durometer hardness, but their specimen and reading provisions must be checked independently. A shared scale name is insufficient to establish that two laboratories used matching procedures.
| Reference | What it covers |
|---|---|
| ASTM D2240-15(2021) | Durometer hardness across multiple instrument types and specified rubbers, elastomers, cellular materials and some plastics. |
| ISO 48-4:2018 | Shore indentation hardness for vulcanized or thermoplastic rubber. It includes A and D, plus AO for low hardness or cellular rubbers and AM for certain thin rubber specimens. |
| ISO 868:2003 | Shore indentation hardness of plastics and ebonite using Type A for softer materials and Type D for harder materials. |
Confirm the publisher scope and use the controlled edition for the exact conditions. ASTM D2240, ISO 48-4 and ISO 868.
Older rubber specifications may still name ISO 7619-1. ISO lists that document as withdrawn and identifies ISO 48-4 as its successor. Confirm how to handle the older reference with the specification owner before changing the acceptance procedure. If a customer calls for IRHD, identify the applicable IRHD method and geometry. A Shore reading cannot be re-labelled as an IRHD result.
Why do specimen thickness and backing matter?
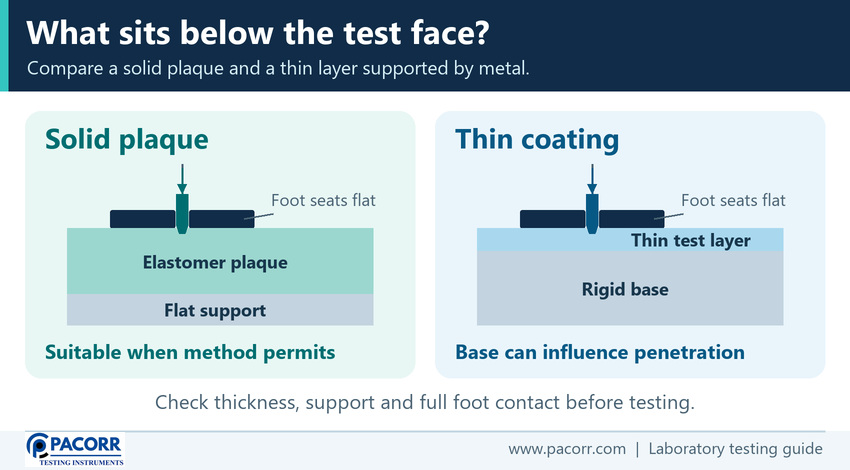
Choose a flat surface large enough for the presser foot and for the required separation between readings and from edges. The material underneath the contact contributes to the response. A thin elastomer on metal may appear harder because the metal restricts deformation. A hollow section can deflect, and a curved face can tilt the foot. A stable reading from either setup can still be unsuitable for comparison with a standard plaque.
Measure the specimen thickness and examine its support before testing. Note films, adhesives, rigid inserts, voids, ribs or surface textures near the planned contact. Check the method for the permitted geometry, minimum thickness and support. When stacking is permitted, record the total thickness, number of layers and contact condition. Loose layers, a bonded laminate and a solid moulded plaque can behave differently even when equally thick.
Use the test face specified for the decision. A ground section can expose the core, while a moulded face retains its surface skin and any local texture. Compare like with like and record any machining or trimming. If the foot cannot seat properly, stop and agree on a suitably prepared specimen or a method that covers the actual geometry.
When should you test a witness plaque?
A witness plaque is made to represent the compound or process when the finished geometry prevents a suitable direct test. For an O-ring, narrow seal lip or hose, a flat plaque can simplify contact and site selection. A thick plaque and a thin finished part can still have different cure histories and surface conditions. Record how the plaque is linked to the batch and how its preparation represents the item being accepted.
If the plaque will govern acceptance, compare it across representative production runs or validate its use under the quality plan. Document the line, mould position, cure history and sampling time where relevant. Where a finished component includes a testable region, compare paired records without treating the two geometries as interchangeable. Reassess the relationship after moving production, changing the mould or altering the cure.
The purchase agreement may instead specify an appropriate small-part technique, a method intended for curved rubber specimens, or a functional test in the actual assembly. Select it for the decision at hand. Write the approved construction, location and method into the inspection plan before placing it in routine use.
Why do time and temperature change the result?
Many elastomers and polymers deform progressively under load. A durometer reading may fall as the indenter penetrates farther during the hold. Define when observation starts, then record the result at the required interval. Check how a digital gauge captures the value. Its maximum hold, displayed instantaneous value and timed record can be different.
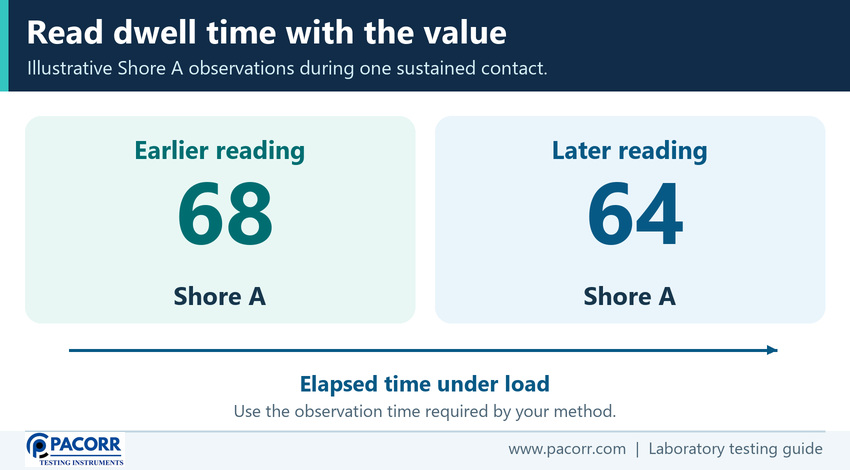
In an illustrative trial, the same contact gives 68 Shore A at an earlier observation and 64 Shore A later. These observations describe the response at different times. Keep them separate for a dwell study and use the specified result for inspection. The two readings and the example trend provide no timing prescription or correction for another polymer.
Condition specimens as specified and allow samples from hot moulding or cold storage to reach the required condition. Keep the test face clean and record the actual temperature and relevant conditioning history. How long a specimen has been stored since moulding or cure can also matter when investigating a change. Pacorr's guide covers why temperature and humidity conditioning need to be documented when comparing samples. Humidity Chamber guide.
How do you take a repeatable Shore reading?
Use this sequence to plan the measurement. Read the selected test method, instrument instructions and inspection plan for the required readings, dwell, spacing and acceptance rules.
- Check the scale marking and instrument identity against the requirement. Confirm the gauge is within its verification interval and complete the approved pre-use checks.
- Record the specimen identity and conditioning. Confirm the chosen face, thickness and support are suitable for the required method.
- Choose fresh sites with the specified clearance between indentations and from edges. Use additional eligible pieces if the planned number of sites will not fit.
- Support the specimen as prescribed. Approach it with the instrument perpendicular to the surface, seat the foot evenly and apply contact without an abrupt impact.
- Read or capture the indication during contact at the specified time. Record the scale and location with the value. Repeat at independent sites.
- Apply the specified summary and decision rule. Record deviations and investigate invalid readings before using the data to disposition the lot.
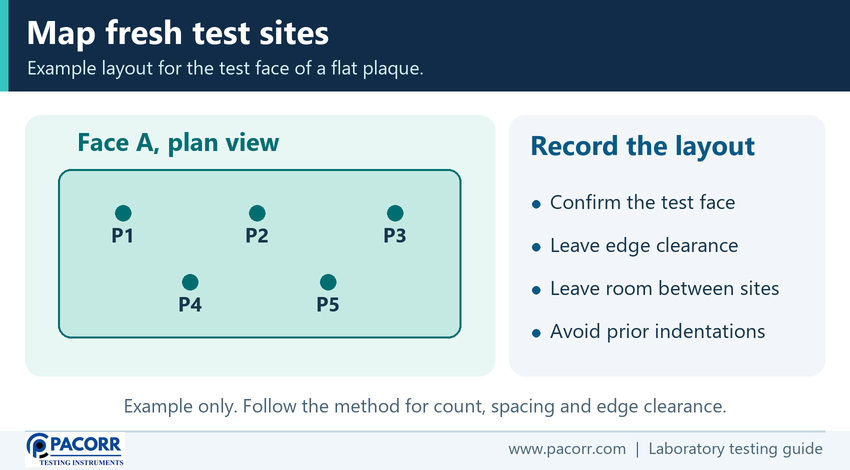
A stand can reduce differences in approach and hold technique when the method allows it. A stand cannot produce flat contact on an unsuitable part or turn several presses on one indentation into independent observations. Keep a site map for components with ribs, inserts, weld lines or other local features.
How should you interpret an inspection example?
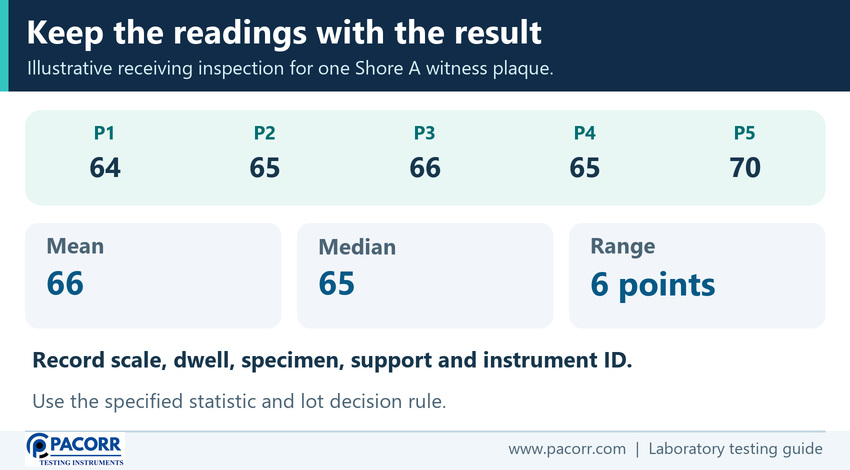
Suppose a fictional drawing specifies 65 ± 5 Shore A on a named plaque under an agreed procedure. Five eligible sites give 64, 65, 66, 65 and 70 Shore A. Their arithmetic mean is 66, the median is 65, and the range is six Shore A points. The example shows how different summaries describe the same set. The method and inspection plan determine which results to report or apply to the specified tolerance.
The value at 70 is the highest observation and sits at the nominal upper limit in this example. Review the location and any documented deviation before deciding whether it is valid. A high reading on an eligible site can be genuine material variation. Apply the agreed rule for boundary values, rounding and any measurement uncertainty. If the rule governs all individual results, assessment based only on the average can hide a failure.
The five measurements describe five sites on the example specimen. An inspection plan may also require independent specimens or a defined sample of parts from the lot. If the supplier certificate says only “65”, request the scale, specimen and method before comparing it with the median. Agreement in the numbers alone gives no evidence of comparable testing.
What belongs on the hardness report?
Give the reviewer enough information to recreate the comparison. Link the raw readings to the part number, batch, specimen, face, instrument ID, scale, test method and timing. Retain the thickness, conditioning and support where they affect comparability. Include the location map and note any departures from the agreed procedure.
| Record item | Example from the illustrative gasket inspection |
|---|---|
| Specimen and face | Plaque P3, as moulded, identified to the incoming lot |
| Result identity | Shore A, method and reading time recorded together |
| Site observations | 64, 65, 66, 65 and 70 Shore A |
| Reported summary | Mean 66, median 65, range six points, with the specified statistic identified |
| Disposition | Apply the agreed rule against the drawing revision |
Record exclusions transparently. For instance, if an operator discovers partial foot contact after a measurement, identify the affected reading, document the reason and take an authorised repeat at a fresh location. A valid high or low observation remains part of the record under the applicable rules.
How do you investigate disagreement between laboratories?
Exchange the procedures and individual readings before comparing averages. Put scale, specified time, specimen geometry, face, thickness, temperature and support side by side. One lab may be testing the moulded skin and the other a trimmed surface. One may be using a stand with a timed capture while the other records the peak on a handheld gauge. Correct those differences before interpreting the result as a material change.
Split identified specimens from the same lot and preparation. Use enough eligible pieces for fresh sites, and vary test order where practical. Compare spread within each laboratory and then compare across labs. Large differences between operators in one lab suggest that technique, timing or seating deserve attention. A consistent difference after conditions have been matched can justify investigating instrument verification, fixtures or the remaining sample differences.
If only one region reads differently, inspect the location map, surface texture and supporting geometry. If the entire lot shifts and reference checks are stable, review cure, material formulation and conditioning records. A retained repeat test should answer a defined question so the reviewer can explain why it was performed.
What can a check block tell you about calibration?
A routine block or reference specimen can identify a change in gauge behaviour between formal verifications. Follow the approved check procedure and keep the reference traceable to its stated range and use. Inspect the foot and tip for damage or deposits, store the gauge so the tip is protected, and keep a record of the check and any correction.
Formal verification can address specified characteristics such as indication, displacement, spring force and geometry. A single satisfactory block result does not establish performance across the scale, and the block cannot check whether a production specimen satisfies the geometry or conditioning requirements. After a failure, take the gauge out of routine use under the lab's procedure and review the records that may have been affected. Ask what the instrument's calibration or verification service covers before relying on it for release testing.
What other tests complement Shore hardness?
Hardness can flag changes in a compound or process even when the part still needs functional validation. Matching Shore A results do not establish matching elongation, tear resistance, recovery, wear or service life. A sealing investigation might need compression set or testing in the assembled joint. A roller investigation might need wear or a check under repeated loading. Use the failure mode to decide what to measure next.
For instance, a roller manufacturer changes filler supplier, and both old and new witness plaques average about 75 Shore A. The new rollers mark the web more readily. Check whether the plaques represent the production roller surface and cure history. Compare the roller condition over its operating cycle and select tests that address the suspected mechanism. If tensile response is relevant, use suitable matched specimens to compare force, extension and reported stress. Pacorr's rubber tensile testing guide and guide to tensile strength.
If the concern is surface cracking under ozone exposure, look at an exposure method relevant to the application. A Shore result alone cannot measure the onset or severity of cracking. Pacorr's ozone testing guide for rubber.
What should you compare when buying a Shore durometer?
Confirm the scale, material, expected hardness band, specimen shape, available flat area and timing requirement. Decide whether you need a handheld gauge for an approved routine check or a compatible stand for repeatable laboratory contact. Ask how readings are captured and whether the selected setup can meet the working procedure.
The Pacorr product listings specify an indication range of 0–100 on the respective scales and list a resolution of 0.5. Resolution is the smallest displayed increment, while the ability to distinguish materials also depends on the instrument, specimen and procedure. Request the current model datasheet and verification scope for your configuration, especially when comparing tolerances or stand requirements. Pacorr Shore A durometer and Pacorr Shore D durometer.
Request a quotation for the identified scale and equipment configuration. Compare what the quote includes for the gauge, compatible stand or fixture, timing, reference materials, and documentation. Public Pacorr listings direct buyers to request a quote. Verify pricing for the actual configuration you need.
Frequently asked questions
Is Shore D always the right choice for plastic?
No. A flexible thermoplastic elastomer can suit Shore A, while a stiffer polymer may need Shore D. Use the scale specified by the test method and purchase requirements, and verify that the specimen gives useful readings.
Is 70 Shore A equal to 70 Shore D?
No. The readings use different indenter shapes and force characteristics. Measure on the scale named in the requirement and report the scale with the number.
Which Shore scale should I use for a rubber gasket?
Shore A is a common starting point for a flexible rubber gasket. A harder grade may call for Shore D. If the gasket is too thin, narrow or curved for valid contact, use the agreed specimen or method instead of forcing the gauge onto it.
Why can a Shore reading fall while the gauge is held in place?
The specimen can continue deforming under load, allowing the indenter to penetrate farther. Check the time and the gauge capture mode, then use the specified procedure on fresh eligible sites.
Can I stack thin rubber sheets for a Shore test?
Use stacked specimens only where the governing method and inspection plan permit them. Record the number of layers, thickness, support and surface contact. A loose stack can respond differently from a solid plaque.
Does a Shore durometer measure Young's modulus?
No. It reports resistance to indentation under scale-specific conditions. Measure Young's modulus with a suitable method for the material if that is the property required.
Can a check block replace calibration?
A routine check block can help detect change between formal verifications. One acceptable reading cannot establish gauge performance over the scale or confirm that a production specimen is suitable.
What should I send Pacorr when requesting a durometer?
Include the scale and method, expected hardness band, specimen drawing, available flat area, thickness, timing needs and whether you need a stand. Identify any verification records your laboratory requires.
Where can you get help selecting a durometer?
Share your material grade, specimen geometry and inspection requirements with Pacorr. Include any measurements you have on the specified scale. This gives the team enough information to discuss the gauge, contact setup and quotation for your test. Contact Pacorr's application team.